
Particle Effects for Divi 5
Meet the Particle Effects feature for Divi 5! Drifting snow, floating bubbles, a connected network of dots, falling confetti, shooting meteors — Particle Effects adds an animated particle layer to any Divi 5 section, row, column or module, without a single line of code and without a separate module. Pick one of 25 ready-made style presets, or build your own look from the ground up: shape, colors, movement, link lines, collisions and mouse interactions are all configured per element, right inside the Visual Builder, with a live preview while you tune it.
Enabling Particle Effects
Particle Effects is a Divi Pixel feature, so it is switched on once from the plugin dashboard and is then available on every element you build.
- Go to Divi → Divi Pixel → General.
- Find the Particles toggle group and turn on Enable Particle Effects.
- Click Save Changes.
NOTE: This feature is built for Divi 5. Once enabled, it adds a Particle Effects option group to the Advanced tab of every Divi 5 module, row, column and section. The older Enable Particles Background option is a separate Divi 4 feature and is not affected by this setting.
Adding Particles To An Element
- Open the page in the Visual Builder.
- Hover the section, row, column or module you want to decorate and open its settings.
- Switch to the Advanced tab and open the Particle Effects group.
- Turn on Enable Particle Effects. The particle layer appears immediately in the preview.
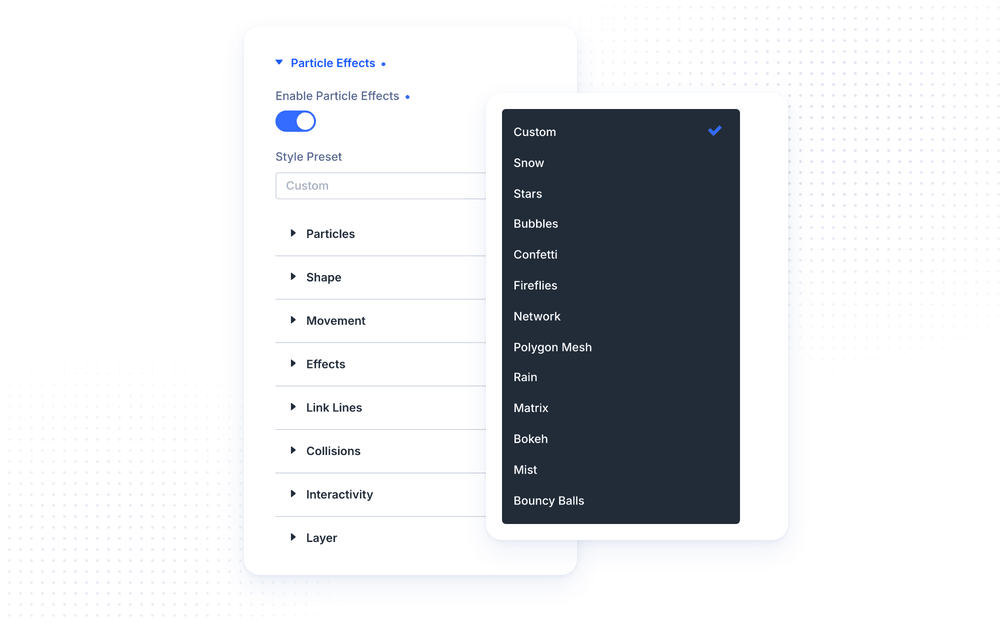
- Choose a Style Preset, or leave it on Custom and configure the options yourself.
Particle Effects settings and style presets
NOTE: The particle canvas is drawn inside the element you enabled it on, and it never captures clicks — buttons, links and forms stacked above it keep working exactly as before.
Style Presets
A Style Preset is a complete, ready-made look. It fills in every option you have not set yourself, so you can start from a preset and then change individual fields — each field you touch overrides the preset for that one option, everything else keeps following the preset.
- Snow — soft flakes drifting downwards with a gentle wobble.
- Stars — a slow starfield with twinkling points.
- Bubbles — rising bubbles that bounce off each other.
- Confetti — falling paper confetti that tilts and rolls as it drops.
- Fireflies — warm glowing dots that wander and blink.
- Network — the classic connected-dots effect with link lines.
- Polygon Mesh — linked dots with the triangles between them filled in.
- Rain — fast, straight rainfall.
- Matrix — falling characters in a monospace font.
- Bokeh — large soft out-of-focus lights.
- Mist — very large, very faint clouds drifting sideways.
- Bouncy Balls — colorful balls that collide and bounce off the edges.
- Emoji Rain — emoji falling and tumbling.
- Hyperspace — stars fired out from the centre, growing and streaking as they fly.
- Orbit — particles spinning around a common centre.
- Color Shift — big translucent blobs cycling through the color wheel.
- Fire — small embers rising in warm colors.
- Merging Bubbles — bubbles that absorb each other and grow on contact.
- Big Circles — huge slow circles drifting upwards through a rainbow.
- Black Hole — a sink at the centre that pulls particles into orbit and swallows them.
- Party — mixed confetti shapes with long curling streamers.
- Cursor Glow — an invisible field that lights up and connects only around the mouse.
- Meteors — shooting stars crossing the element and burning out.
- Comet Trails — comets wandering on a noise field, each with a rainbow tail.
- Custom — no preset; every option is yours.
NOTE: Seven presets are fixed effects: Hyperspace, Big Circles, Black Hole, Party, Cursor Glow, Meteors and Comet Trails. They are built from emitters and other mechanics that a flat option list cannot express, so they read only your colors plus a few sizing options (count, size, speed). While one of these is selected, the option groups that do not apply are hidden automatically.
Particles
The Particles group controls how many particles there are and what they look like.
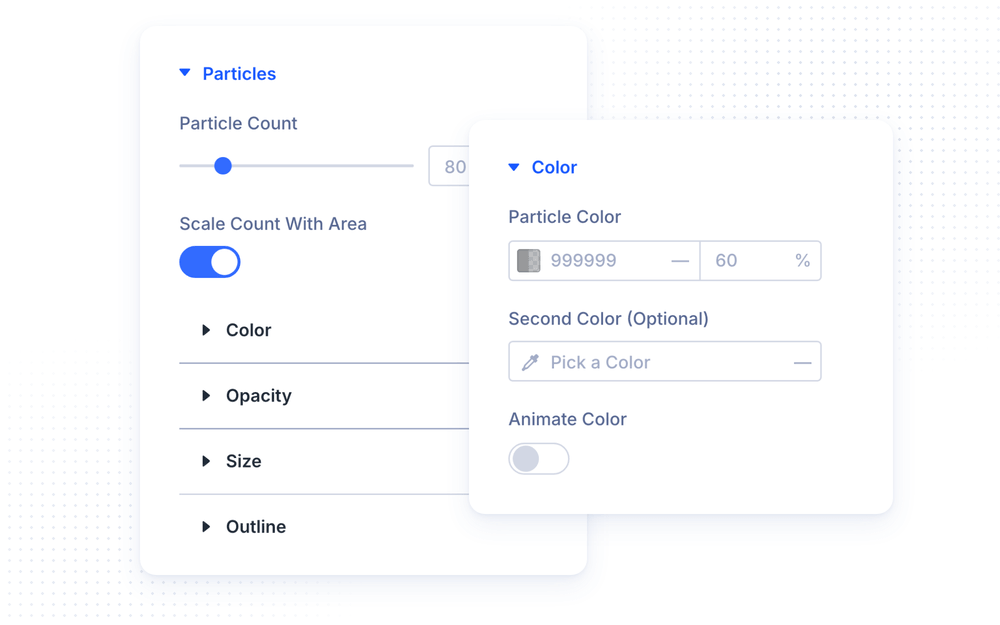
- Particle Count — how many particles are drawn.
- Scale Count With Area — treats the count as a density for a 1920×1080 area, so a small element gets proportionally fewer particles and a full-width hero gets more. Turn it off when you want exactly the number you typed.
Particle count, color and palette options
Color
- Particle Color — the base color. Its transparency also sets how solid the particles are, so a color at 30% opacity gives a subtle background layer.
- Second Color to Fifth Color (Optional) — add up to four more colors and each particle picks one at random. The next picker only appears once the previous one is filled, so an unused palette stays out of your way.
- Animate Color — cycles the particle color through the color wheel instead of keeping it fixed.
- Hue Speed, Saturation Speed, Lightness Speed — how fast each channel moves, in degrees per second. Set Hue Speed high for a fast rainbow, low for a slow drift.
- Animate All Particles Together — off gives every particle its own position in the cycle, so the element shows many colors at once.
Opacity
- Random Opacity — gives every particle its own opacity between the minimum and the particle color’s own opacity.
- Minimum Opacity — the lower end of that range.
- Fade In And Out — animates each particle between the minimum and full opacity.
- Fade Speed — how fast that fade runs.
- Fade All Particles Together — off gives every particle its own point in the fade.
Size
- Particle Size — the maximum particle size, up to 600px. A handful of very large particles at a low opacity makes an excellent soft background.
- Random Size — varies the size per particle.
- Minimum Size — the smallest size used when Random Size is on.
Outline
- Outline Width — draws an outline around each particle, up to 300px.
- Outline Color — the outline color. Combine a transparent particle color with a solid outline to get hollow rings.
Shape
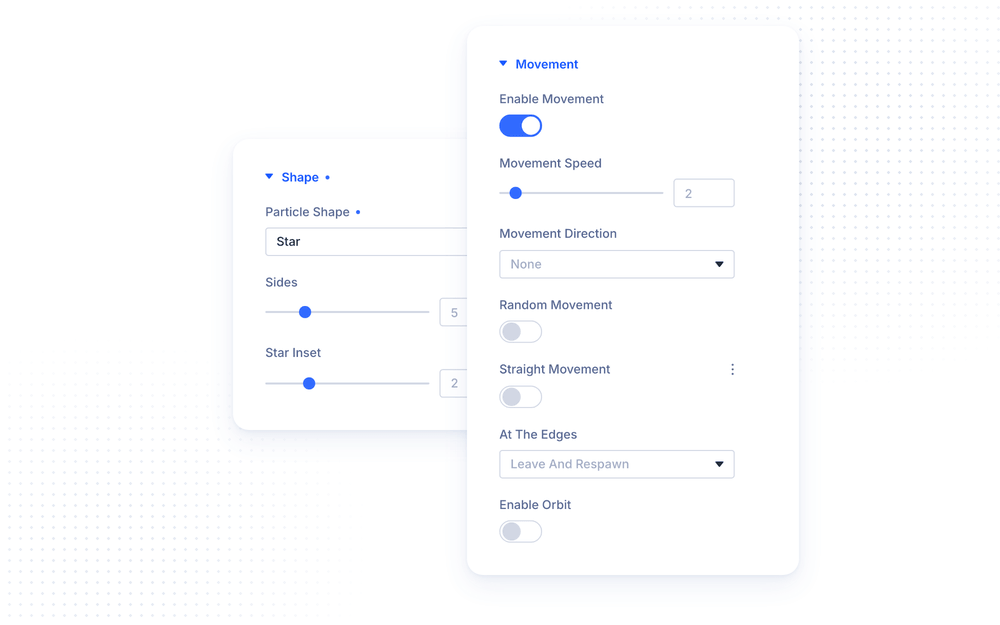
Particle Shape decides what is actually drawn: Circle, Square, Confetti (Squares + Circles), Triangle, Polygon, Star, Line, Emoji, Image or Text. Some shapes add their own options:
- Sides — the number of sides, for Polygon and Star.
- Star Inset — how deep the points of a Star cut in.
- Emoji (comma separated) — one or more emoji, e.g.
❤️, 💛, 💙. Each particle picks one. - Image — pick an image from the Media Library. Tint Image With Particle Color recolors it with the particle color; this works for SVG images only.
- Text (comma separated), Font Family, Font Weight — draw characters or short words as particles.
Particle shape and movement options
Movement
- Enable Movement — turn off for a completely still particle field.
- Movement Speed — how fast particles travel.
- Movement Direction — a compass direction, or Outwards / Inwards to move away from or towards the centre. None lets particles drift freely.
- Random Movement — each particle wanders instead of holding its course.
- Straight Movement — keeps every particle on a perfectly straight line.
- At The Edges — what happens when a particle leaves the element: Leave And Respawn, Bounce Off Edges, Destroy or Keep Going.
- Enable Orbit and Orbit Speed — particles spiral around the centre of the element instead of travelling in a straight line.
Effects
The Effects group adds motion on top of the particle itself. Each effect has its own toggle, so they can be combined freely.
- Enable Glow with Glow Size and Glow Color (Optional) — wraps every particle in a soft halo, the way a firefly or a neon dot bleeds into the background. Glow Size is how far the halo reaches, in pixels. Leave Glow Color empty and the halo takes the particle color; lower that color’s opacity for a fainter glow.
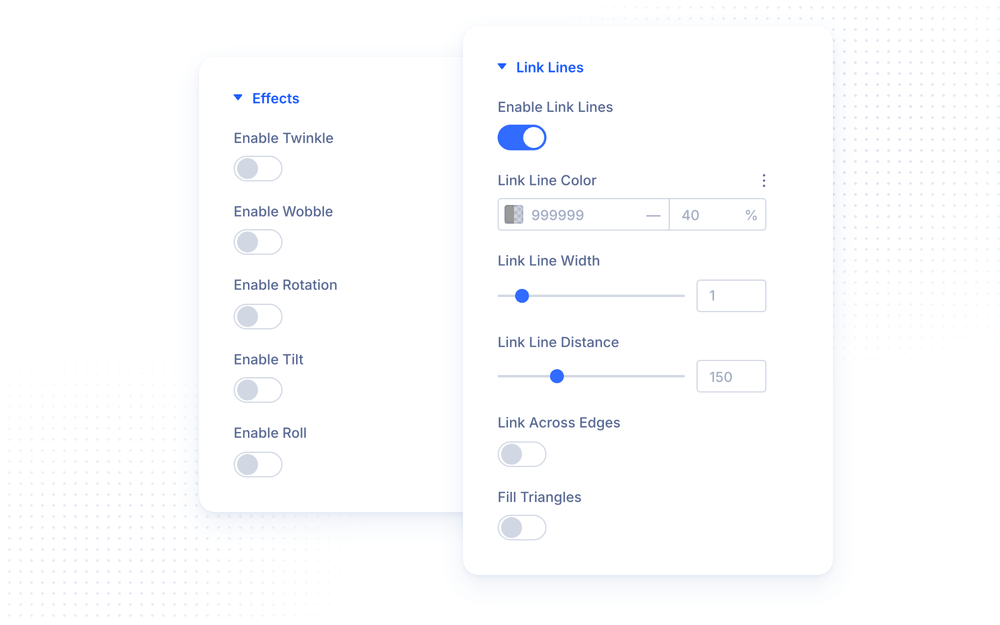
- Enable Twinkle with Twinkle Frequency, Twinkle Opacity and Twinkle Color (Optional) — random particles flash brighter, like stars.
- Enable Wobble with Wobble Distance and Wobble Speed — particles sway from side to side as they travel.
- Enable Rotation with Rotation Speed, Rotation Direction and Random Start Angle — spins the shape in place.
- Enable Tilt with Tilt Speed — flips the particles in 3D so flat shapes flutter like paper.
- Enable Roll with Roll Speed and Roll Shading — spins particles around their vertical axis and shades the back side.
NOTE: Tilt and Roll together are what make confetti read as real paper rather than flat squares. They have no visible effect on a plain circle. Glow reads best on a dark section, where the halo has somewhere to fade into — on a white background a large glow mostly washes out. It applies to every shape, including emoji and images. It is also the one effect the graphics card pays for on every frame, so Performance Mode caps it at a 10px halo drawn once; turn Performance Mode off if you want the full size and strength.
Effects and link line options
Link Lines
Link lines connect nearby particles and are what create the familiar “network” look.
- Enable Link Lines — draws a line between particles that are close enough.
- Link Line Color, Link Line Width, Link Line Distance — the look of the lines and how close particles must be before a line appears.
- Link Across Edges — connects particles across opposite edges of the element.
- Fill Triangles with Triangle Opacity and Triangle Color (Optional) — fills the areas enclosed by three linked particles, turning the network into a mesh.
Collisions
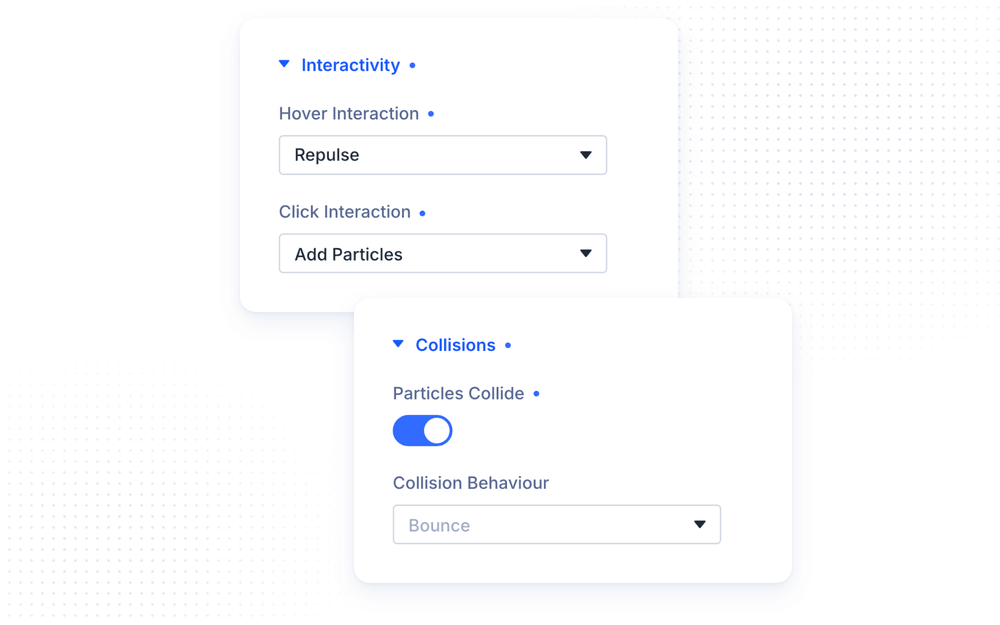
- Particles Collide — particles react to each other instead of passing through.
- Collision Behaviour — Bounce (they bounce apart), Absorb (the larger one eats the smaller one) or Destroy.
- Absorb Speed — how quickly one particle consumes another in Absorb mode.
Interactivity and collision options
Interactivity
Particles can react to the visitor’s mouse.
- Hover Interaction — Grab (lines reach towards the cursor), Bubble (particles swell), Repulse (particles flee), Attract, Connect, Trail, Slow Down or Bounce.
- Click Interaction — Add Particles, Remove Particles, Bubble, Repulse, Attract or Pause / Resume.
NOTE: Hover and click work even when the particles sit behind your content, and the particle canvas still never intercepts clicks — your buttons and links keep working normally.
Performance & Layer
- Performance Mode — halves the frame rate, renders the particle canvas at screen resolution instead of retina resolution, so a full-width section paints a quarter of the pixels, and caps Glow at a 10px halo drawn once. Worth turning on when several elements on one page use particles, or on a very large section. Off by default.
- Render In Front Of Content — draws the particles above the element’s content instead of behind it. Useful for snow falling in front of a hero image; keep it off when particles should stay a background texture.
Performance And Accessibility
Particle Effects is built to stay light on the pages that use it and invisible on the pages that do not.
- Nothing is loaded on pages where no element has the effect enabled — no scripts, no canvas.
- The animation pauses automatically while the element is scrolled out of view, and runs at a 60fps cap — or 30fps with Performance Mode on.
- Visitors who have asked their system to reduce motion get a still particle image instead of an animation, with no setting to configure.
- A few presets (Meteors, Hyperspace, Comet Trails, Party) pull in one small extra script for their trails or streamers, and only on pages that actually use those presets.
NOTE: The heaviest settings are Particle Count and Particle Size. If a page runs several particle elements at once, switch on Performance Mode under Performance & Layer — on a retina screen it cuts the frame work by roughly two thirds. A few hundred small particles or a handful of very large ones both perform well; several hundred very large particles do not. When in doubt, leave Scale Count With Area on so smaller elements automatically draw fewer particles.