
MCP Integration
Meet the AI Assistants feature of Divi Pixel! Ask Claude, ChatGPT, Cursor or any other AI assistant that speaks MCP to “build a landing page for my bakery with a typing headline, flip box services and animated counters”, and it builds the page for you in Divi 5, using Divi Pixel modules. The assistant gets a set of Divi Pixel tools: it can see which modules your site has, read every setting of each module, and build complete sections. Before anything is saved, Divi Pixel checks every setting against the real module, so the result opens in the Visual Builder like a page you built by hand.
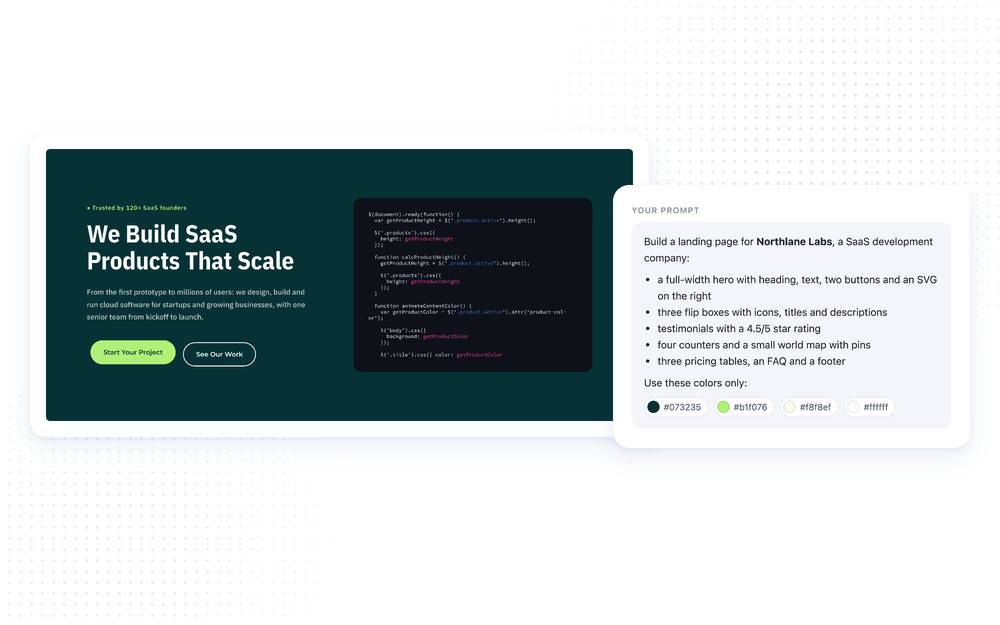
With AI Assistants you can:
- Build complete pages or single sections from a plain-language description
- Start from the Divi Pixel Layout Library: the assistant searches about 3,000 designed sections from all layout packs and module demos, inserts the ones that fit, recolors them to your brand and rewrites their texts
- Edit pages you already have: change texts, colors and spacing, swap or remove modules, or add new sections
- Use every active Divi Pixel module plus the core Text, Heading, Button, Image, Icon, Divider, Accordion and Blurb modules
- Let the assistant write the copy, pick colors and fonts and set spacing, backgrounds, borders and anchors
- Keep full control: everything is saved as a draft page, published pages are never changed
- Connect any MCP client, including Claude Desktop, Claude Code and Cursor
What You Need
- WordPress 6.9 or newer, which includes the Abilities API that Divi Pixel uses to offer its tools
- Divi 5
- Divi Pixel [VERSION] or newer
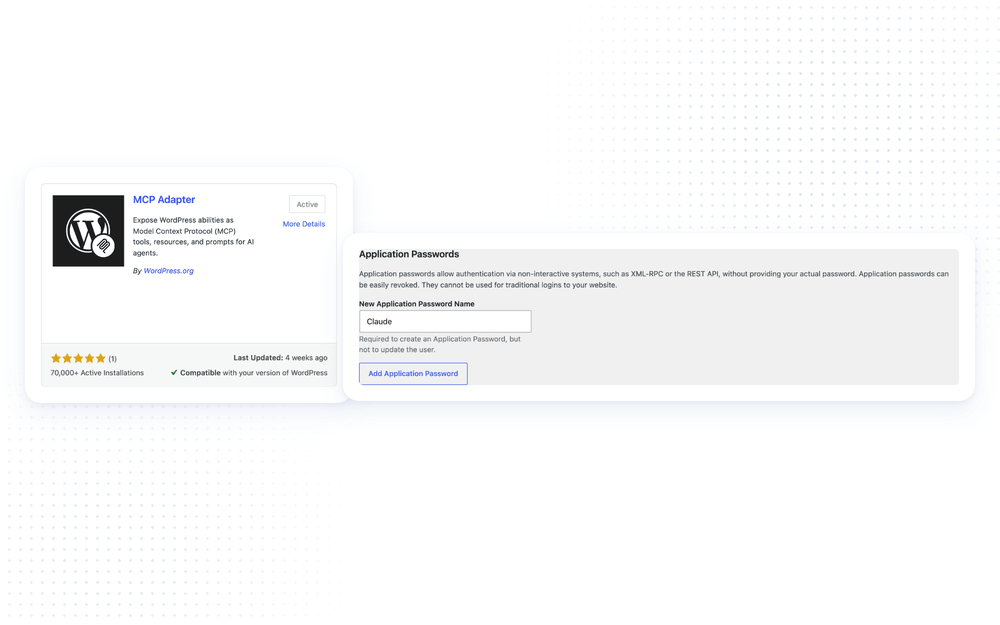
- The free MCP Adapter plugin by WordPress.org, which connects those tools to AI assistants
- An AI assistant that supports MCP (Model Context Protocol), such as Claude Desktop, Claude Code or Cursor
NOTE: There is nothing to switch on in Divi Pixel itself. Once the MCP Adapter is active, the Divi Pixel tools are available to every connected assistant that signs in with an Editor or Administrator account.
Installing The MCP Adapter
- Go to Plugins → Add New Plugin in your WordPress dashboard
- Search for MCP Adapter
- Click Install Now, then Activate
Creating An Application Password
The assistant signs in to your site as a WordPress user. Instead of your normal password, it uses an application password that you can revoke at any time.
- Go to Users → Profile (or edit the user the assistant should act as)
- Scroll down to Application Passwords
- Enter a name, for example Claude, and click Add New Application Password
- Copy the password that appears. WordPress shows it only once, and the spaces are part of it
NOTE: The user needs the Editor or Administrator role, because the assistant creates and edits pages. Creating a separate user just for the assistant makes it easy to see and revoke what it does. Application passwords require HTTPS on live sites.
Connecting Claude Desktop
Claude Desktop is the Claude app for Mac and Windows. It connects through a small helper that runs on your computer, so Node.js needs to be installed.
NOTE: Claude in the web browser (claude.ai) cannot connect this way. Use the desktop app, Claude Code or another MCP client.
- Open the Claude configuration file in a text editor. Create it if it does not exist yet:
- Mac: in Finder choose Go → Go to Folder, enter ~/Library/Application Support/Claude and open claude_desktop_config.json
- Windows: press Win + R, enter %APPDATA%\Claude and open claude_desktop_config.json
- Add your site to the file, replacing the address, user name and application password with your own. If the file already has an mcpServers section, add only the my-divi-site entry to it:
{ "mcpServers": { "my-divi-site": { "command": "npx", "args": ["-y", "@automattic/mcp-wordpress-remote@latest"], "env": { "WP_API_URL": "https://example.com/wp-json/mcp/mcp-adapter-default-server", "WP_API_USERNAME": "your-username", "WP_API_PASSWORD": "xxxx xxxx xxxx xxxx xxxx xxxx" } } }}- WP_API_URL: your site address followed by /wp-json/mcp/mcp-adapter-default-server. For a site on your own computer (Local, MAMP and similar), use its local address with http, for example http://mysite.local/wp-json/mcp/mcp-adapter-default-server
- WP_API_USERNAME: the WordPress user name the application password belongs to, not the name you gave the application password
- WP_API_PASSWORD: the application password you created above, not your normal password
- Save the file, quit Claude Desktop completely (Cmd + Q on Mac, File → Exit on Windows) and open it again
- Start a new chat and ask “Which Divi Pixel tools do you have?”. Claude should list tools such as dipi/list-modules and dipi/build-section
The Divi Pixel tools don’t show up?
- Node.js 18 or newer is needed. Check it by running node -v in Terminal
- Node.js installed with nvm (or another version manager): Claude Desktop can’t find npx on its own. Run which npx in Terminal and use the full path it prints as command. Also add the folder of that path to env, so the helper finds the same Node version:
"command": "/Users/you/.nvm/versions/node/v20.20.2/bin/npx","env": { "PATH": "/Users/you/.nvm/versions/node/v20.20.2/bin:/usr/bin:/bin", "WP_API_URL": "...", "WP_API_USERNAME": "...", "WP_API_PASSWORD": "..."}- The log tells what went wrong. On Mac it is ~/Library/Logs/Claude/mcp-server-my-divi-site.log. “401” or “not allowed” there means the user name or application password is wrong
Connecting Claude Code
Claude Code connects to your site directly. First turn your user name and application password into a sign-in token by running this in your terminal:
printf 'your-username:xxxx xxxx xxxx xxxx xxxx xxxx' | base64 | tr -d '\n'Then add the site, pasting the token after Basic:
claude mcp add --transport http my-divi-site https://example.com/wp-json/mcp/mcp-adapter-default-server --header "Authorization: Basic PASTE_THE_TOKEN_HERE"New Claude Code sessions pick up the site automatically.
Connecting Cursor
- Open (or create) the file .cursor/mcp.json in your home folder
- Add the same mcpServers configuration as for Claude Desktop above
- Restart Cursor
Other MCP clients work the same way: point them at your site’s MCP address, which is your site URL followed by /wp-json/mcp/mcp-adapter-default-server, and sign in with the user name and application password.
Building Your First Page
Describe the page the way you would brief a designer. Name the business, the tone, the brand colors, and the sections you want from top to bottom. For example:
Build a landing page for “Northbeam Logistics”, a freight forwarding company in Hamburg. Tone: confident, practical. Brand colours: navy #0b2545, accent orange #f28c28. Use Divi Pixel modules wherever they fit. Sections: a hero with a typing line cycling Road, Sea, Air; the four services as flip boxes; four animated key figures; three client quotes; a closing call to action. Put it on a new draft page called “Northbeam Landing”.
The assistant then works through these steps on its own:
- For each section you asked for, such as a hero, pricing or testimonials, it searches the Divi Pixel Layout Library and reads the best matches
- Where a library section doesn’t fit what you asked for, it builds the section itself from the modules on your site, for example a chat-style conversation or animated key figures
- It builds all sections in one go, library sections recolored to your brand colors. If a setting is wrong, Divi Pixel answers with a clear error and the assistant fixes it before anything is saved
- It creates the draft page, then rewrites the texts of the library sections for your business
- It gives you a link that opens the draft in the Visual Builder
A five-section landing page typically takes two to three minutes. Open the draft, review the copy and images, adjust what you like in the Visual Builder, and publish.
Editing An Existing Page
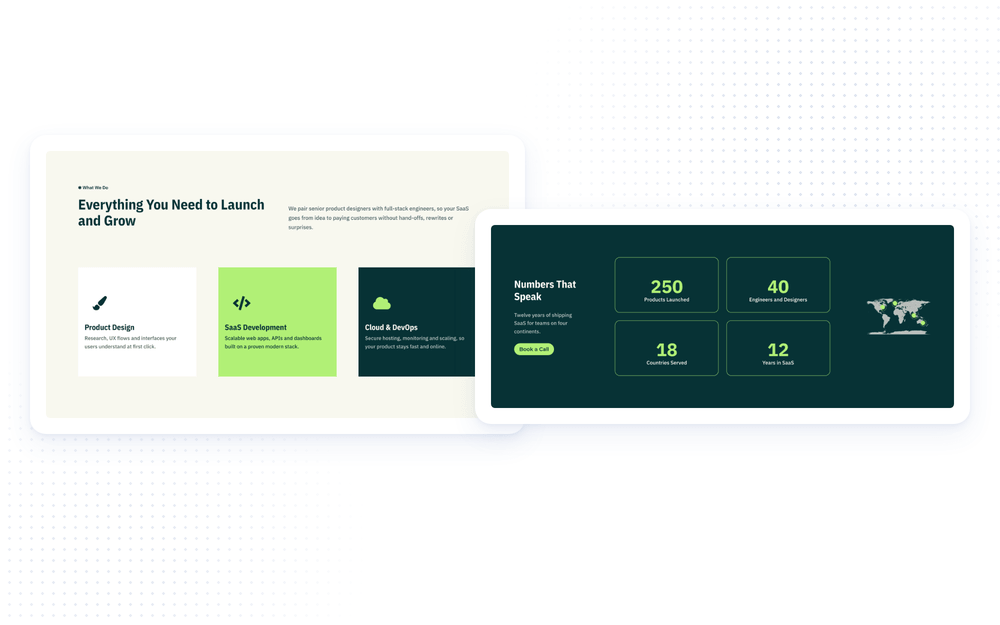
Give the assistant the page and say what should change. The page ID is the number after post= in the address bar when you edit the page in WordPress. For example:
On page 1234, make the hero background navy #0b2545 with white text, replace the three image blurbs in the services section with flip boxes, and add a call to action section at the end.
The assistant reads the page section by section, with every setting it has, and changes only what you asked for. Everything else on the page, including presets, custom CSS and global modules, stays exactly as it was.
- Drafts are changed directly. WordPress keeps the previous version under Revisions, so you can roll back
- Published pages are never changed. The assistant saves the edited version as a new draft next to the original, with (AI edit) added to its title. Review it, then copy its content over or publish it in place of the original
- Global modules show up as a reference to their Divi Library item. Ask the assistant to edit that library item to change the global module everywhere
What The Assistant Can Use
- All active Divi Pixel modules. Modules you hid under Divi → Divi Pixel → Modules are not offered to the assistant
- The core Text, Heading, Button, Image, Icon, Divider, Accordion and Blurb modules for plain content
- Sections, rows and columns with their design settings, such as backgrounds, spacing and anchor IDs
Some modules show content that already exists on your site rather than text the assistant writes: Pixel FAQ and Pixel Testimonial show your FAQ and testimonial posts, Pixel Blog Slider and Pixel Filterable Grid show your posts, and the gallery modules show images from your Media Library. The assistant is told how many of these posts your site has and skips such modules when there are none, choosing for example the Accordion for an FAQ it writes itself.
Using The Layout Library
The assistant can use every section of the Divi Pixel Layout Library, the same sections you find under Insert Section → Divi Pixel in the Visual Builder. Each section is described by its role (hero, pricing, team, menu…), its layout, its modules and its style, so you can ask for things like “a dark pricing section with three plans” or “use the Bakery layout pack’s style”.
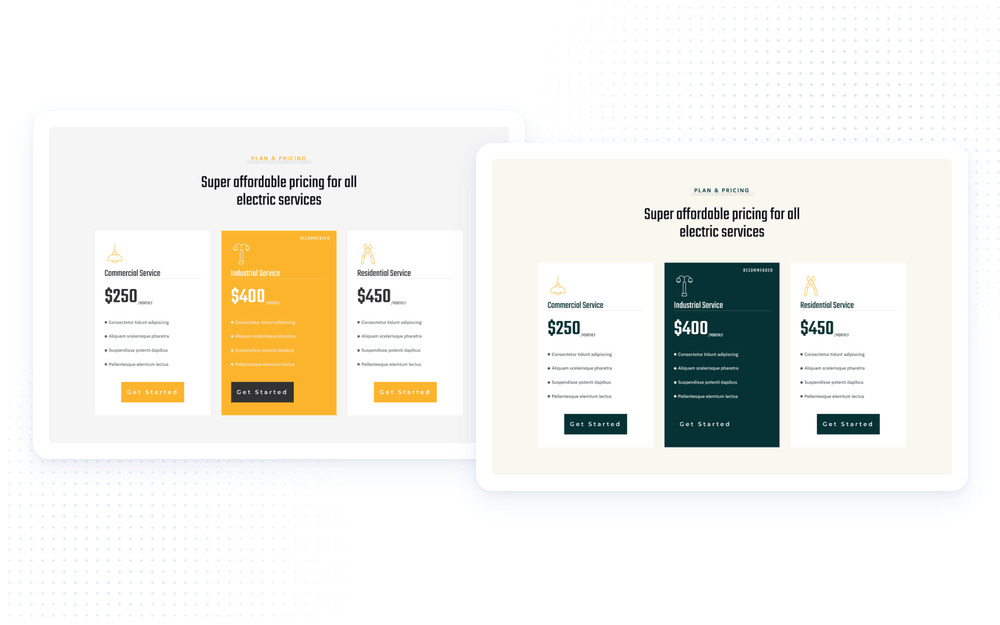
- Imported like in the Visual Builder. Images are copied to your Media Library, Divi Library layouts the section uses are created, and presets are added the way Divi’s own import adds them
- Recolored. The assistant swaps the section’s colors for your brand colors, including the colors inside its presets
- Global colors become fixed colors. The library’s global colors are not added to your site
- Demo photos stay. The section keeps its demo images until you or the assistant replace them. Check them before publishing
- Permission. Importing library sections needs the Divi Portability permission, the same as importing layouts in the Visual Builder
Brand Colors And Fonts
Give your palette as hex codes and say that no other colors may be used. After saving, the assistant checks the page for colors that don’t come from your palette:
- Colors in library sections are swapped for yours, including lighter and transparent versions of them
- Default colors a module shows when nothing is set, such as the red “Closed” status of Pixel Business Hours, are set to your palette
- Your Divi theme colors (Theme Customizer: text, headings, links, buttons) apply wherever a module has no color of its own. The assistant sets colors on those modules instead
- Placeholder texts a module shows when nothing is set, such as “Your description goes here.”, are replaced with real copy
- Fonts: the assistant uses one heading and one body font for the whole page, taken from the library sections or your Divi theme fonts
Colors inside images and illustrations can’t be changed. The assistant tells you which images to replace.
Good To Know
- Drafts only. The assistant creates new draft pages and changes drafts. Edits to published, scheduled or private pages go to a new draft copy
- Modules on existing pages. The assistant can change the settings of any Divi 5 module already on a page, including core modules such as the Blurb. New modules it adds come from the list above
- Images. In sections it builds itself, the assistant can only use images by their web address. Swap in your own images in the Visual Builder after the page is built
- Placeholder links. Buttons the assistant could not link anywhere meaningful may point to a made-up address. Check every button before publishing
- Pixel Vote and Pixel Poll built by the assistant get their unique ID when you first open the page in the Visual Builder, so open and save the page once before publishing it
Tips For Better Results
- Give the business, audience and tone in one or two sentences, so the copy fits
- List the sections in order and say which ones should be interactive, such as cards that flip or numbers that count up
- Give your brand colors as hex codes and, if you have one, the font
- Name anchor IDs for sections that buttons should scroll to, such as “services” or “contact”
- Say “Use Divi Pixel modules wherever they fit” to make the assistant prefer them over plain text and images
- Name a section’s content precisely when you want it built a certain way, such as “a text-message chat where a customer pre-orders two loaves”: the assistant then builds it instead of adapting a library section
- Name a layout pack whose style you like, such as “in the style of the Bakery layout pack”, to keep all sections consistent